Without visual appeal, a website with only text becomes boring. Images make a webpage interesting and attractive. In this lesson, you’ll learn how to add images in a website and different related topics.
Adding Images
The image element (img) is used to add an image to a webpage. It is an empty element that means no closing tag is required. When adding an image in a webpage, you have to mention the following two attributes in the image element, these are mandatory attributes-
- src – short for source. The value of this attribute contains the source or path (URL) to the image. The URL couls be either absolute or relative. Usually, this is a relative URL as images you’ll add are stored in the same web server as the HTML are.
- alt – short for alternative text. It describes the image shortly in text format.

You should use alt attribute in every image for the following reasons-
- For any reason, if the image is not displayed, the text in the alt attribute will be appeared in place of the image. So, visitors at least get idea about the image.
- It improves accessibility of the webpage. Visually impaired visitors rely on alt attribute to know what the image shows.
- As search engines can’t read the content of an image, alt attribute is the way to let SE inform about the image.
- Visitors who disable images in the browser can still read its description.
Example:
<img src=”https://schoolsofweb.com/wp-content/uploads/HTML5.png” alt=”HTML5 logo” />
Output:

a. The optional trailing forward slash at the end of the img element is the XHTML way to indicate a self-closing element. Please note the required single space before the slash.
b. If the image has no meaning (for ex. if it is part of the layout), you should still mention the alt attribute, but, leave its value empty, like this – alt=””.
c. Though theoretically, there is no exact character limit of the alt attribute, but, try to keep it as short possible. Conventionally, they are limited to 1024 characters, but, research shows that search engines (Google) display first 16 words of 7 or 8 characters each in its result page from the alt text.
Other attributes of the image element (img) are –
- title: The value of the title attribute is displayed when a visitor brings the mouse over the image. So, add the information in the title attribute that you want visitors see for the image.
- width: The width attribute specifies the width of the image in pixel.
- height: The height attribute specifies the width of the image in pixel.
- ismap: This attribute indicates that the image is being used for server-side image map. Click server-side image map to know more about it.
- usemap: This attribute helps to make the client-side image map. Click client-side image map to know more about it.
Example:
The following example shows the use of some of the above attributes.
<img src=”https://schoolsofweb.com/wp-content/uploads/HTML5.png” alt=”HTML5 logo” title=”This is the logo for HTML version 5.” width=”150” height=”150” />
Output:

If you hover over the above image, the title will be displayed as tooltip. The height and width of the image is set to 150 pixels each.
Even you don’t mention the width and height of an image, browsers can detect the size. Web browsers download text and associated markups of a webpage before they download images. So, if you don’t mention height and width of images in a webpage, the text jumps around to fit the images after it completes downloading the images. This makes the page a bit slow.
If you mention height and width attributes, you assist browsers to determine the size before it starts downloading the image; so, browsers reserve required spaces for the images from the beginning and fill the text around those spaces and the webpage remain stable till completing loading the remaining part of the page. Thus, you can optimize the site by speeding it up a bit.
Adding Images in HTML5
HTML5 introduces few elements to add images in the webpage.
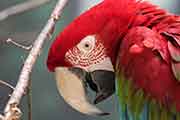
In HTML5, images that are not the part of the main flow of the webpage (images without which the document is completed) are wrapped with figure elements. And, to add the caption to an image in HTML5, figcaption element is used. See the following example how the elements are used-
<figure>
<figcaption>A cute parrot in a tree</figcaption>
<img src=”https://schoolsofweb.com/wp-content/uploads/parrot.png” width=”180” height=”120” />
</figure>
Output:
Creating right images for the website
When creating images for the website, you have to remember the following factors –
(1) Format:
The images you use in your website should be in formats that all the operating systems can recognize and browsers run on those operating systems can display without issues. Three most commonly used image formats for the web are – GIF, JPEG, and PNG.
JPEG/JPG:
- Pronounced “jay-peg”, short for Joint Photographic Experts Group.
- It supports 24-bit color (millions of colors).
- When you need lots of colors in a picture, save the image in JPEG format. Complex images such as photographs where smooth color transitions and continuous tones are the right choice for this format.
- JPEG uses lossy compression. After an image is compressed in JPEG format, few of its original information are permanently lost which your eyes don’t need. But, after compression, the file size is reduced significantly, so, it loads quickly in the browser. JPEG compresses a picture which has many colors better than GIF or PNG format does.
- JPEG files have .jpg or .jpeg extension.
GIF:
- Pronounced “gif” or “jif”, short for Graphics Interchange Format.
- It supports 8-bit color (256 colors).
- When you need a picture with large area of same color (which is called flat color), then save it as GIF format. Logos, line are, clip are, icons, illustrations, diagram etc are right choice for GIF format.
- GIF uses lossless compression, so after the image is compressed in GIF format, there will be no color degradation. GIF compresses large area of same colors or repetitive patterns better than JPEG does.
- GIF files have .gif extension.
PNG:
- PNG is the replacement for GIF. In some cases, it is better than GIF.
- Pronounced “pee-en-gee” or “ping”, short for Portable Network Graphics.
- The 8-bit PNG supports 256 colors and 24 bit PNG supports millions of colors.
- Like GIF, when you need a picture with large area of same color (which is called flat color), then save it as PNG format. Logos, line are, clip are, icons, illustrations, diagram etc are right choice for it.
- Like GIF, PNG also uses lossless compression, so after the image is compressed in PNG format, there will be no color degradation. PNG compresses large area of same colors or repetitive patterns better than JPEG does. PNG compresses images better than GIF does.
- PNG files have .png extension.
(2) Size:
- Create an image with the same width and height that you want it to display in the browser. If you want to display an image in 300px and 200px, create the image with that size using any image editor (ex. photoshop).
- If you need the same image in smaller/larger size, don’t use size attribute inside the image element to resize it; instead create smaller/larger version of the image. You can save the new image in a subfolder of the image folder where the original images is stored.
(3) Resolution:
- The number of pixels that exists in every square inch of an image is called resolution of that image. Both computer screens and images are made up of pixels/dots. A computer screen can display 72 pixels per inches; therefore, create web images with the resolution of 72 pixels to get the best performance.
- If you create an image with more resolution than 72 pixels, the excessive pixels will increase the image size and take more time to download.
(4) Transparency
- Through a transparent image you can see the background of the webpage. You can create a transparent image using GIF or PNG format, but not with JPEG format.
- If your image has perfect straight edges and you want to save it as a transparent image, then save it in GIF format.
- If your image has perfect not straight edges (ex. curves), then save it in PNG format. Before version 7, internet explorer didn’t support transparency correctly.
(5) Animation
- With GIF format, you can create a very basic animated image (PNG or JPEG format don’t support this feature). In the animated GIF image, numbers of frames rotate in sequence and make it like an animation.
Dos of images
- It is a good practice to mention the width and height attributes in image element.
- If you need to display different dimension of an image than the original size, use any Image editing tools (ex. photoshop) to change the dimension.
- Resolution for web images should be 72 ppi.
Don’ts of images
- Avoid linking to an image which is not stored in your server. In case, owner of that image changes the location of the image or rename it or remove it from the server, your visitors won’t see that image in your site.
- If you either specify the original height or the width of an image, the remaining one will be displayed correctly automatically. But, it is not a good practice.
In the following code, only the width has been mentioned, but in the output, the browser displays the right height (120 pixels). (Note: The original image is 180 pixels x 120 pixels)<img src=”https://schoolsofweb.com/wp-content/uploads/HTML5.png” width=”180” />
- Don’t resize your images by changing value of the height and width attributes. Check the following situations-
- If you specify the width and height of an image larger than the actual size, then, the browser will display it grainy (not clear/sharp).
In the following code, the width and height of the image are 270 pixels and 180 pixels, whereas original width and height are 180px and 120px. See the enlarged bird at right which is not as clear as the original image (the left one)-<img src=”https://schoolsofweb.com/wp-content/uploads/HTML5.png” width=”270” height=”180” alt=”Enlarged image” />
Output:

- If you specify the width and height of an image smaller than the actual size, then, it may look sharp in the browser, but, it will take longer time to load than the smaller image should take.
In the following code, the width and height of the image are decreased to 90 pixels and 60 pixels-<img src=”https://schoolsofweb.com/wp-content/uploads/HTML5.png” width=”90” height=”60” alt="Shrinked image" />

- If you specify height and width of the image differently which are not proportional to the original size, than the image will be distorted.
In the following code, the width and the height of the image (the right one) are 250 pixels and 50 pixels-<img src=”https://schoolsofweb.com/wp-content/uploads/HTML5.png” width=”250” ehight=”50” alt=”Distorted image” />
Output:

Instead use image editing tools to resize an image.
- If you specify the width and height of an image larger than the actual size, then, the browser will display it grainy (not clear/sharp).
- Don’t use align attribute in image element (img) to align the image around the other parts of the webpage. HTML5 doesn’t allow this. Instead, use CSS for this purpose.